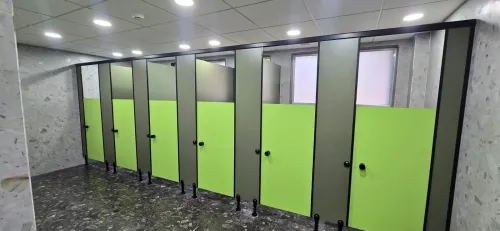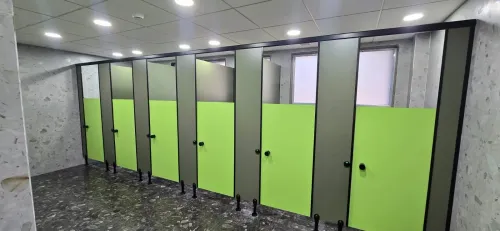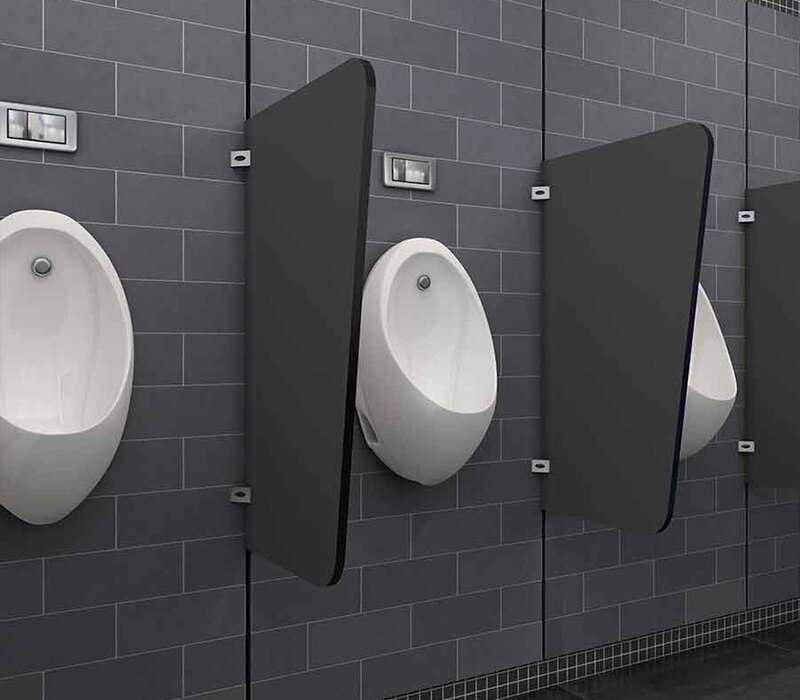
The installation depends on measurements and decisions made before any panel is manufactured. By the end, you will know what to provide at enquiry, which drawings to approve, how the system is fixed around plumbing and finishes, and what to inspect at handover.
Key takeaways
- Survey finished walls, floor levels, fixtures, spacing and ceiling height before quoting.
- Approve layout, support method and fabrication drawings before releasing the order.
- Coordinate delivery and installation with plumbing, flooring and wall-finish completion.
- Test fixings, clearances and doorless privacy returns before handover.
Start with the enquiry and a finished-site survey
A reliable urinal partition quotation starts with verified site conditions, not architectural dimensions alone. Tell the supplier the urinal count, centre-to-centre spacing, finished wall-to-wall measurements, finished floor level, ceiling height, desired partition height and privacy-return depth.
1. Share the plan, elevation, photographs and site address, then mark pipework, traps, flush valves, access panels, grab bars, dispensers, mirrors and door swings. These details reveal conflicts that a plan can hide.
2. Confirm whether the urinal partition is wall-hung, floor-supported, floor-to-ceiling or overhead-braced. Wall-hung panels transfer load through wall brackets and structural backing; floor-supported panels need sound floor anchorage. Overhead-braced systems need a stable brace and suitable floor fixing.
3. Arrange a finished-site survey before fabrication. The installer checks wall plumbness, floor level, ceiling or soffit height, actual backing or blocking, plumbing rough-in positions, circulation clearances and the condition of tile, flooring and wall finishes.
4. Record responsibility for backing, anchors, carrier steel, ceiling reinforcement, unloading, protection and installation. A quotation that omits these items can produce panels with nowhere suitable to fix them.
The urinal partition installation process depends on these measurements because installers set out from finished wall faces and finished floor lines. Do not approve fabrication from raw framing dimensions.
Field trimming can expose a core, damage a formed edge or move a factory-drilled hole, so obtain the manufacturer’s permitted cutting and edge-sealing method before altering any panel.
Approve the layout, support method and fabrication drawings
Manufacturing must wait for signed approval of the coordinated layout, support method, fabrication drawings and finish schedule. The approval set should use field-verified dimensions, not architectural measurements alone, and show finished wall-to-wall sizes, floor level, ceiling height, wall plumbness, plumbing rough-ins, door swings and structural backing.
Approve these items before releasing fabrication:
- Urinal centre-to-centre spacing, screen width, height, privacy returns and the field-clear dimensions left around each fixture.
- Toilet cubicle partition arrangement, including overhead-braced, floor-to-ceiling or ceiling-hung construction.
- Panel thickness, edge details, colour, hardware, pilasters, doors and fixing locations.
- Wall, floor or ceiling support positions, with anchors selected for concrete, masonry, metal studs, gypsum board or a framed plumbing chase.
- Accessibility clearances, turning space, lavatory clearance, grab-bar zones and fixture operating space.
- Plumbing access panels, valves, traps and accessories that could conflict with brackets or panels.
| Support method | What must appear on the approved drawing | Approval risk |
|---|---|---|
| Wall-supported | Bracket positions, backing locations and anchor type | Tile over gypsum board cannot carry the load like concrete |
| Floor-supported or overhead-braced | Floor anchors, pilasters, brace line and finished floor level | Uneven floors or weak overhead structure can shift the partitions |
| Ceiling-hung | Suspension points, carrier structure above the ceiling and access route | A suspended ceiling grid is a finish system, not structural support |
The final fabrication drawing should identify every panel, pilaster and cut-out with dimensions, elevations and fixing details. Sign the revision number, because changes after approval can force re-fabrication or leave brackets misaligned with concealed services.
Release the order, manufacture the parts and plan delivery
Signed drawing approval releases the order only when the fabrication information is complete. The package should show panel elevations, pilaster locations, finished dimensions, mounting method, hardware handing, and clearances around plumbing and accessories.
1. Confirm responsibility before production starts. The purchase documents must identify who supplies backing, blocking, anchors, carrier steel, ceiling reinforcement, field measurements, unloading, installation, protection, and final adjustment. Without this allocation, a bathroom partition can arrive before the substrate or compatible hardware is ready.
2. Check the coordinated layout. Verify the urinal partition against urinal centre lines, pipework, valves, access panels, approach clearances, turning space, lavatory clearance, grab-bar zones, and fixture operating space. A nominal 12-inch screen does not prove that the remaining privacy or accessibility clearance is adequate.
3. Manufacture and identify the parts. The supplier cuts panels, prepares edges and holes, finishes pilasters, matches hardware to the approved mounting method, and labels components against the drawing. Ceiling-hung systems require support fixed to structure above the suspended ceiling or to a designed carrier; the ceiling grid alone is not structural.
4. Pack and schedule delivery around site readiness. Confirm the delivery date, unloading route, storage area, installation sequence, and protection requirements. Keep stainless-steel components away from cement grout, mortar, aggressive cleaners, and iron-contaminated tools; remove protective film within the manufacturer’s stated period, not after heat or sunlight has baked it on.
The shipment should arrive with the approved drawings, hardware, fixing information, and a clear list of items still required on site. That prevents a delivery from becoming a delay.
Set out and install the partition around fixtures and finishes
Fix panels from the finished wall faces and finished floor, not from raw framing or an assumed wall centreline. A reliable urinal partition installation process begins by snapping control lines, then positioning each panel, pilaster and return against those lines. Measuring incorrectly leaves unequal gaps, binding doors and misplaced screens.
Before drilling, the installer confirms:
- Finished wall-to-wall dimensions, floor level, wall plumbness and ceiling or soffit height
- Urinal centre lines, pipe routes, traps, valves, access panels and exposed fittings
- Door swings, grab-bar zones, lavatory clearance, turning space and required fixture approach
- Backing locations for brackets, plus the position of mirrors, dispensers, hand dryers and wall protection
- Tile thickness, raised flooring, skirtings and the final floor clearance beneath each panel
The fixing method must match the structure. A wall-hung bathroom partition transfers its load through verified wall brackets and backing, while a floor-supported system needs accurate floor anchors and stable pilasters. For a toilet cubicle partition, overhead-braced, floor-to-ceiling and ceiling-hung arrangements are different systems: never substitute one without checking the brace, soffit or ceiling structure.
Install brackets and concealed supports before fragile accessories obstruct access, then fit panels after finished tile and flooring are complete where possible. The installer checks every clearance again before tightening fixings, because a privacy screen must not narrow circulation, interfere with plumbing maintenance or turn an accessible fixture into an unusable one.
Test, protect and hand over the completed installation
A reliable handover proves that the urinal partition matches the approved drawings, fits the finished room and remains secure under use. Do not accept it from a distance: compare field dimensions, floor levels, wall condition and fixing locations with the installation record before final payment.
- Check each panel is plumb, rigid and aligned, with consistent floor gaps and privacy returns.
- Confirm brackets, anchors, fasteners and any ceiling supports are tight, correctly seated and suitable for the actual substrate.
- Inspect laminate faces, edges, corners and stainless-steel fittings for scratches, dents, chips, corrosion or exposed sharp points.
- Test adjacent doors, indicator bolts, coat hooks and accessories for free movement, correct latching and clearance from the partitions.
- Confirm panels do not obstruct urinals, flush valves, traps, access panels, circulation routes or cleaning equipment.
- Remove protective film, drilling debris, labels, temporary bracing and unused packing without damaging finished surfaces.
A restroom cubicle supplier should record the final wall-to-wall measurements, floor and ceiling clearances, anchor locations, deviations and photographs, then provide cleaning instructions, warranty details and adjustment contacts. The handover document must also state who owns future sealing, hardware adjustment and damage repairs.
Cubicle World industries Pvt Ltd can support a dependable closeout by coordinating the installer’s final inspection with the site manager, plumbing contractor and facilities team. That meeting exposes missing backing, inaccessible valves or conflicting accessories before the area opens, rather than after occupants discover them.
Related products
 | Urinal Partition Give a new meaning to your restroom space with vibrant coloured Privy Divider Panel Laminates (urinal partition) coupled with rust resistant... View product → |
 | Urinal Partition Give a new meaning to your restroom space with vibrant coloured Privy Divider Panel Laminates (urinal partition) coupled with rust resistant... View product → |
Frequently asked questions
What information does a supplier need before quoting a urinal partition?
Provide the urinal count, centre-to-centre spacing, finished wall-to-wall measurements, finished floor level, ceiling height, partition height and privacy-return depth. A finished-site survey verifies those dimensions before fabrication.
What must you approve before releasing a urinal partition order?
Approve the layout, partition dimensions, support method and fabrication drawings. Confirm how the system meets walls, floors, ceilings and nearby fixtures.
What happens after a urinal partition order is released?
The supplier fabricates the specified parts, checks the order against the approved drawings and plans delivery around site access, storage and installation readiness.
What is checked during urinal partition handover?
The installer checks alignment, fixing security, clearances, privacy coverage and interfaces with fixtures and finishes. Protect the completed work and record outstanding items before handover.
Related products
 | Restroom Cubicles PRODUCT DESCRIPTION A lively, colourful, safe and sturdy world, especially designed to enhance the artistic of the kinds. View product → |
 | LOCKER ROOM CUBICLES Locker systems opens up a new generation of locker systems – a world of ultra-modern and exceptionally smart storage solutions made using Compact... View product → |
 | Restroom Cubicles Presenting serenity and simplicity at its finest, the CW shine Nylon series is the typical model for restroom cubicles which provide easy... View product → |
 | Restroom Cubicles PRODUCT DESCRIPTION CW Floppy are tailor-made for restrooms. These cubicles have a clear floor concept which is very friendly as far as the... View product → |